For the Cream Cheese Base:
-
8 oz (226g) cream cheese, full-fat (Philadelphia is best – brick, not tub)
-
¼ cup (60ml) whole milk (do not use low-fat or skim)
-
¼ cup (60ml) heavy cream (adds richness and creaminess)
-
3 large egg yolks (room temperature)
-
¼ cup (30g) cake flour (see substitutes below)
-
2 tablespoons (15g) cornstarch
-
1 tablespoon fresh lemon juice (brightens flavor)
-
½ teaspoon vanilla extract
For the Meringue:
-
3 large egg whites (room temperature – very important!)
-
¼ teaspoon cream of tartar (or ½ teaspoon white vinegar)
-
⅓ cup (65g) granulated sugar
For the Water Bath:
-
Boiling water (enough to fill your baking pan about 1 inch deep)
Substitutions & Swaps:
-
No cake flour? Use ¼ cup all-purpose flour + 1 tablespoon cornstarch. Remove 1 tablespoon of the all-purpose flour and replace with cornstarch. Sift together.
-
No cream of tartar? Use ½ teaspoon white vinegar or lemon juice. The acid stabilizes the meringue.
-
No heavy cream? Use all whole milk (increase to ½ cup total). The cake will be slightly less rich but still delicious.
-
Gluten-free? Use a gluten-free flour blend (measure-for-measure) in place of cake flour. The texture will be slightly more delicate.
-
Lemon lovers: Add an extra teaspoon of lemon zest to the cream cheese base.
Step-by-Step – The Path to a Jiggly Masterpiece
1. Prepare Your Pan (This Matters More Than You Think)
Japanese cotton cheesecake is delicate. It needs the right pan setup.
For a 7-inch or 8-inch round springform pan:
-
Cut a circle of parchment paper for the bottom
-
Cut a strip of parchment paper to line the sides (or use a parchment collar)
-
Lightly grease the bottom and sides with butter or nonstick spray
-
Place the parchment paper inside
-
Wrap the outside of the springform pan tightly with two layers of heavy-duty aluminum foil. This prevents water from the bath from seeping into the pan.
Why this matters: The water bath is essential for even baking. But if water leaks into your springform pan, you’ll have soggy cheesecake. Wrap it well.
2. Preheat Your Oven
Set your oven to 320°F (160°C) . Place a rack in the lower-middle position.
3. Make the Cream Cheese Base (Smooth Is the Goal)
In a medium saucepan over low heat (or a double boiler), combine the cream cheese, whole milk, and heavy cream. Stir constantly with a rubber spatula until the cream cheese is completely melted and the mixture is smooth. This takes about 5–7 minutes. Do not let it boil.
Remove from heat. Transfer to a large mixing bowl.
4. Add Egg Yolks and Dry Ingredients
Whisk the egg yolks into the warm cream cheese mixture one at a time. The mixture should be glossy and smooth.
Sift the cake flour and cornstarch together over the bowl. Add the lemon juice and vanilla extract. Whisk until just combined—no dry streaks, but don’t overmix.
Set aside.
5. Make the Meringue (The Secret to Fluffiness)
In a clean, dry, grease-free bowl (if there’s any fat, your egg whites won’t whip), beat the egg whites with an electric mixer on medium-low speed until foamy.
Add the cream of tartar. Increase speed to medium-high. Beat until soft peaks form (when you lift the beater, the peaks flop over).
Gradually add the sugar, 1 tablespoon at a time, while beating. Continue beating until stiff peaks form (the peaks stand straight up when you lift the beater). The meringue should be glossy, not dry or grainy.
Test: Turn the bowl upside down. If the meringue doesn’t move, you’re done.
6. Fold the Meringue into the Base (Gentle, Patient, Slow)
Add about ⅓ of the meringue to the cream cheese mixture. Fold it in with a rubber spatula (cut down through the center, scrape along the bottom, bring up and over). Don’t stir—you’ll deflate the air.
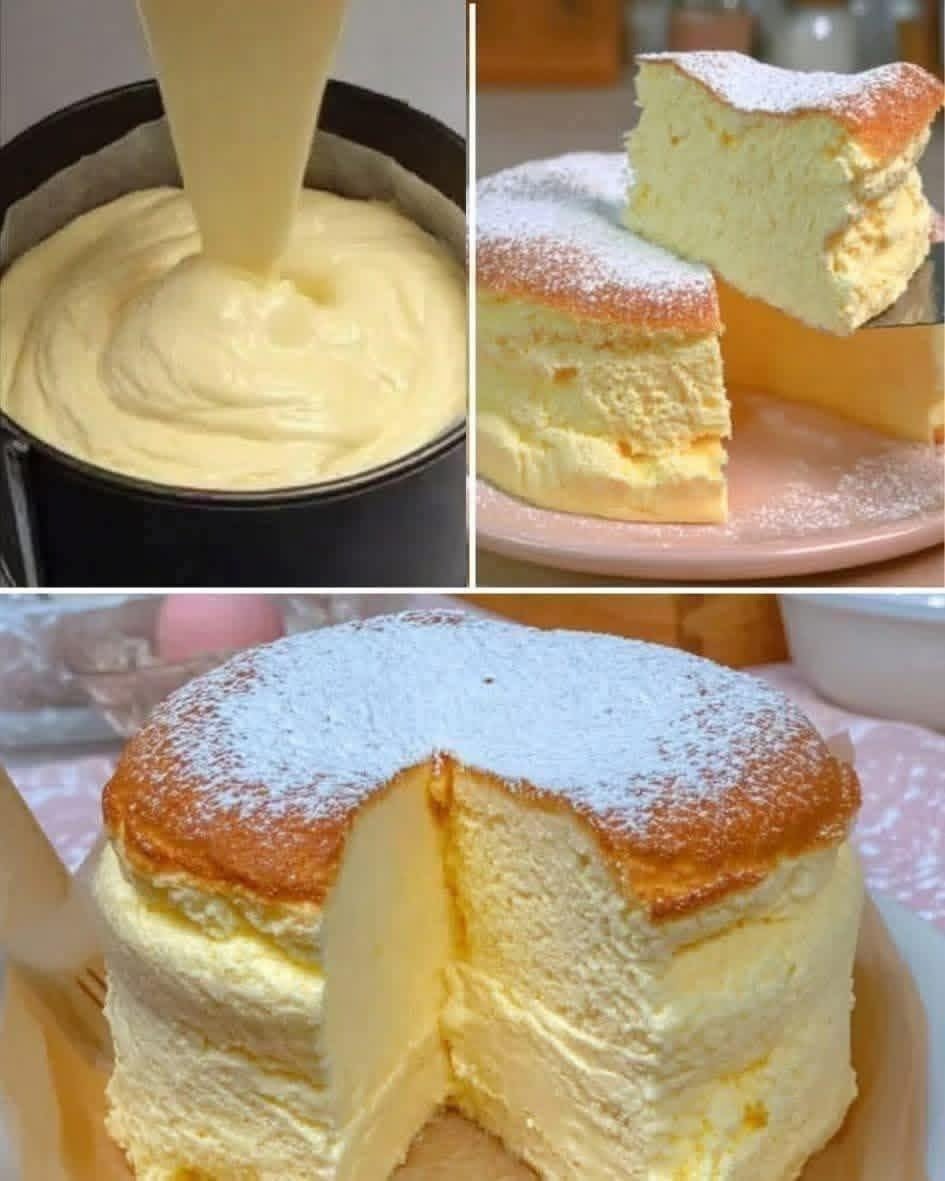
Add the remaining meringue in two more batches, folding gently each time. The batter should be pale yellow, airy, and pourable.
7. Pour and Tap
Pour the batter into your prepared springform pan. Smooth the top with a spatula. Tap the pan firmly on the counter 5–6 times to release large air bubbles.
8. Set Up the Water Bath
Place the foil-wrapped springform pan into a larger roasting pan or baking dish. Place the setup on your preheated oven’s lower rack.
Carefully pour boiling water into the larger pan until it reaches about 1 inch up the sides of the springform pan. Do not get water inside the springform pan.
Important: Boiling water only. Cold or warm water will lower the oven temperature too much.
9. Bake Low and Slow
Bake at 320°F (160°C) for 60–70 minutes.
-
At 50 minutes, check the color. The top should be golden brown.
-
The cake is done when a wooden skewer inserted into the center comes out clean or with just a few moist crumbs (not wet batter).
-
The cake will be tall, jiggly, and slightly domed.
10. Turn Off the Oven, Crack the Door (The Secret Step)
This is the step that prevents collapse.
Turn off the oven. Crack the oven door open about 2 inches (use a wooden spoon to hold it open). Leave the cake in the oven for 30 minutes with the door cracked.
This gradual cooling prevents sudden temperature changes that make the cake collapse.
11. Remove and Cool Completely
Carefully lift the springform pan out of the water bath. Remove the foil. Run a thin knife around the edge of the cake to release it from the pan.
Let the cake cool in the pan on a wire rack for 30 minutes. Then remove the springform ring and peel off the parchment paper.
Cool completely on the rack (about 1 more hour). For the cleanest slices, refrigerate for at least 2 hours before serving.
12. Slice and Serve
Use a sharp, thin-bladed knife. Wipe the blade clean between slices. Serve at room temperature (cold cheesecake hides the delicate texture).
Watch people’s faces when they take the first bite. That look of surprise? That’s the cotton cheesecake effect.
My Best Tips for Cotton Cheesecake Success
Use room temperature ingredients. Cold egg whites won’t whip properly. Cold cream cheese won’t blend smoothly. Leave everything on the counter for 1 hour before starting.
Don’t open the oven during baking. Every time you open the door, cold air rushes in and the cake can collapse. Trust the timer.
The water bath is non-negotiable. This cake needs gentle, even heat. Without a water bath, the outside will overcook before the inside sets, and the top will crack.
Wrap your springform pan well. Double-layer heavy-duty foil. Some people use slow cooker liner bags or oven-safe baking bags. Do whatever it takes to keep water out.
Don’t overmix the batter. After adding the meringue, fold just until combined. Overmixing deflates the air you worked so hard to create.
Your meringue should be stiff but not dry. If it looks curdled or grainy, you’ve over-beaten. Start over with fresh egg whites.
The cake will shrink as it cools. This is normal. It will pull away from the sides of the pan slightly. Don’t panic.
If the top cracks: You probably baked too hot or too long. Or you skipped the gradual cooling. It’s still delicious—just less photogenic.
The Classic Water Bath Method (Explained Simply)
Japanese cotton cheesecake is baked in a water bath (also called a bain-marie). Here’s why and how.
Why: The water bath creates a humid, gentle heat that cooks the cake evenly from all sides. The steam prevents the top from browning too quickly and keeps the interior moist. Without it, you’ll get cracks, a dry crust, and a dense center.
How: Place your springform pan (wrapped in foil) inside a larger pan. Pour boiling water into the larger pan. Bake.
Troubleshooting water bath issues:
-
Water leaking into the pan? Your foil wrapping wasn’t tight enough. Double-wrap next time.
-
Water evaporated during baking? Your larger pan was too shallow. Use a deeper pan or add more water at the start.
-
Top is still pale after 60 minutes? Your oven runs cool. Increase temperature by 10°F next time.
Fun Variations (Once You’ve Mastered the Original)
Matcha Japanese Cotton Cheesecake – Add 1 tablespoon of matcha powder to the dry ingredients (mix with flour and cornstarch). The green color and earthy flavor are gorgeous.
Chocolate Japanese Cotton Cheesecake – Add 2 tablespoons of cocoa powder to the dry ingredients. Fold in ¼ cup of mini chocolate chips with the last addition of meringue.
Yuzu or Citrus Version – Replace lemon juice with yuzu juice (available at Asian grocers) or a combination of lemon, lime, and orange juice. Add zest from all three.
Honey Cotton Cheesecake – Replace 2 tablespoons of the granulated sugar with honey. Reduce the cream slightly. The honey adds floral notes and moisture.
Pumpkin Spice (Fall Version) – Add ¼ cup pumpkin puree (reduce milk by 2 tablespoons) and 1 teaspoon pumpkin pie spice. Not traditional but wonderful.
How to Store and Serve
Room temperature: Best served at room temperature. If you refrigerate it, let the slices sit on the counter for 20–30 minutes before serving.
Refrigerator: Store in an airtight container for up to 4 days. The texture will become slightly denser but still delicious.
Freezer: Wrap individual slices in plastic wrap then foil. Freeze for up to 2 months. Thaw overnight in the refrigerator. Bring to room temperature before serving.
Do not freeze the whole cake. It’s too delicate. Slice first, then freeze.
Frequently Asked Questions
Why did my Japanese cheesecake collapse?
Most common reason: you didn’t cool it gradually in the oven with the door cracked. Sudden temperature change = collapse. Second most common: underbaked (center was still liquid). Third: overbeaten egg whites (too stiff and dry).
Why did my cheesecake crack on top?
Oven too hot, baked too long, or didn’t use a water bath. Next time, verify your oven temperature with an oven thermometer.
Can I make this without a springform pan?
Yes, but it’s harder. Use a regular cake pan with high sides, line it with parchment paper (with overhang to lift the cake out), and wrap the bottom in foil. To remove the cake, lift it out using the parchment overhang.
Why is my cheesecake dense and heavy?
You overmixed the batter and deflated the meringue. Or your egg whites weren’t whipped to stiff peaks. Or you skipped the water bath.
Can I reduce the sugar?
You can reduce to ¼ cup, but the meringue will be less stable and the cake less sweet. The structure needs some sugar to hold the air bubbles.
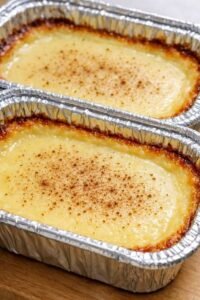
Why does my cheesecake have a custard layer at the bottom?
This is actually normal for Japanese cotton cheesecake! The denser cream cheese mixture settles slightly during baking. Some people call this the “happy layer.” It’s not a mistake.
Can I double this recipe?
Bake two separate cakes. A double batch won’t fit in a standard springform pan and won’t bake evenly.
A Warm, Encouraging Conclusion
I’m not going to lie to you. Japanese cotton cheesecake is more challenging than box mix brownies. It requires patience, precision, and a willingness to fail once or twice. That’s the truth.
But here’s the other truth: the first time you pull a tall, golden, wobbling cheesecake from the oven, and the first time you cut into that impossibly soft interior, and the first time someone takes a bite and says “I didn’t know cheesecake could feel like this”—that moment makes every failed attempt worth it.
My first cake was a pancake. My second was cracked like a desert floor. My third made me cry happy tears. And now I’ve made this cake for birthdays, anniversaries, and absolutely no reason at all. Every single time, it brings joy.
Not because I’m a perfect baker. Because the cake is magic. And now that magic can be yours.
Did you make this cake? I genuinely want to know. Did it jiggle? Did it crack? Did you eat half of it standing at the counter before anyone else saw it? (No judgment. I’ve done that too.) Drop a comment below—your wins and your oops moments are what make baking a shared adventure.
And if this recipe earns a place in your dessert rotation, please share it with a friend who loves a baking challenge. Pin it, text it, or just tell someone about “the jiggly cheesecake from Japan.”
Now go preheat that oven. Your cloud is waiting. 🍰✨