Introduction
There’s something undeniably magical about the aroma of freshly baked bread wafting through your home. It’s a scent that instantly conjures feelings of warmth, comfort, and nostalgia. In a world brimming with exotic sourdoughs and artisanal ryes, sometimes the most profound satisfaction comes from a beautifully simple loaf of classic white bread. This isn’t just any white bread, though. We’re talking about the beloved Amish White Bread – a farmhouse staple renowned for its incredibly soft texture, delicate sweetness, and comforting richness. It’s the kind of bread that begs to be slathered with butter, piled high with sandwich fillings, or simply torn off in generous chunks and savored. This recipe takes you back to basics, embracing the time-honored traditions that make this bread so special, transforming humble ingredients into a masterpiece of home baking.
Amish White Bread stands out for its tender crumb and slightly sweet flavor profile, making it universally appealing. Unlike some rustic breads that boast a chewy crust and airy interior, this loaf is all about consistent softness from edge to edge. It achieves its characteristic tenderness through a generous amount of milk, a touch of sugar, and often butter or oil, which enrich the dough and inhibit excessive gluten development, resulting in that melt-in-your-mouth quality. Its versatility is another key to its enduring popularity; it’s perfect for everything from everyday toast and hearty sandwiches to soaking up gravies or transforming into decadent bread pudding. Mastering this recipe means unlocking a lifetime of delicious possibilities, offering a comforting foundation for countless meals and cherished memories.
Fear not, aspiring bakers! While the idea of making bread from scratch might seem daunting, this Farmhouse Loaf recipe for Amish White Bread is designed for success, whether you’re a seasoned pro or just beginning your bread-making journey. We’ve broken down each step with clear, concise instructions, focusing on techniques that guarantee a perfectly risen, golden-brown loaf with that signature soft interior. From activating the yeast to the satisfying moment of slicing into your warm, homemade creation, we’ll guide you through every stage. Embrace the therapeutic process of kneading, watch in wonder as your dough rises, and experience the immense pride that comes from pulling a perfect loaf from your oven. Get ready to fill your kitchen with the irresistible scent of home, and your table with the ultimate comforting staple.
Nutritional Information
Per serving (approximate values, based on 12 slices per loaf):
- Calories: 180
- Protein: 6g
- Carbohydrates: 32g
- Fat: 3g
- Fiber: 1g
- Sodium: 280mg
Ingredients
- 2 ¼ teaspoons active dry yeast (one standard packet)
- ½ cup warm water (105-115°F / 40-46°C)
- 2 cups warm milk (105-115°F / 40-46°C)
- ⅓ cup granulated sugar
- ¼ cup unsalted butter, melted
- 1 ½ teaspoons salt
- 6-7 cups all-purpose flour, divided, plus more for dusting
- Butter or oil for greasing the bowl and loaf pan
Instructions
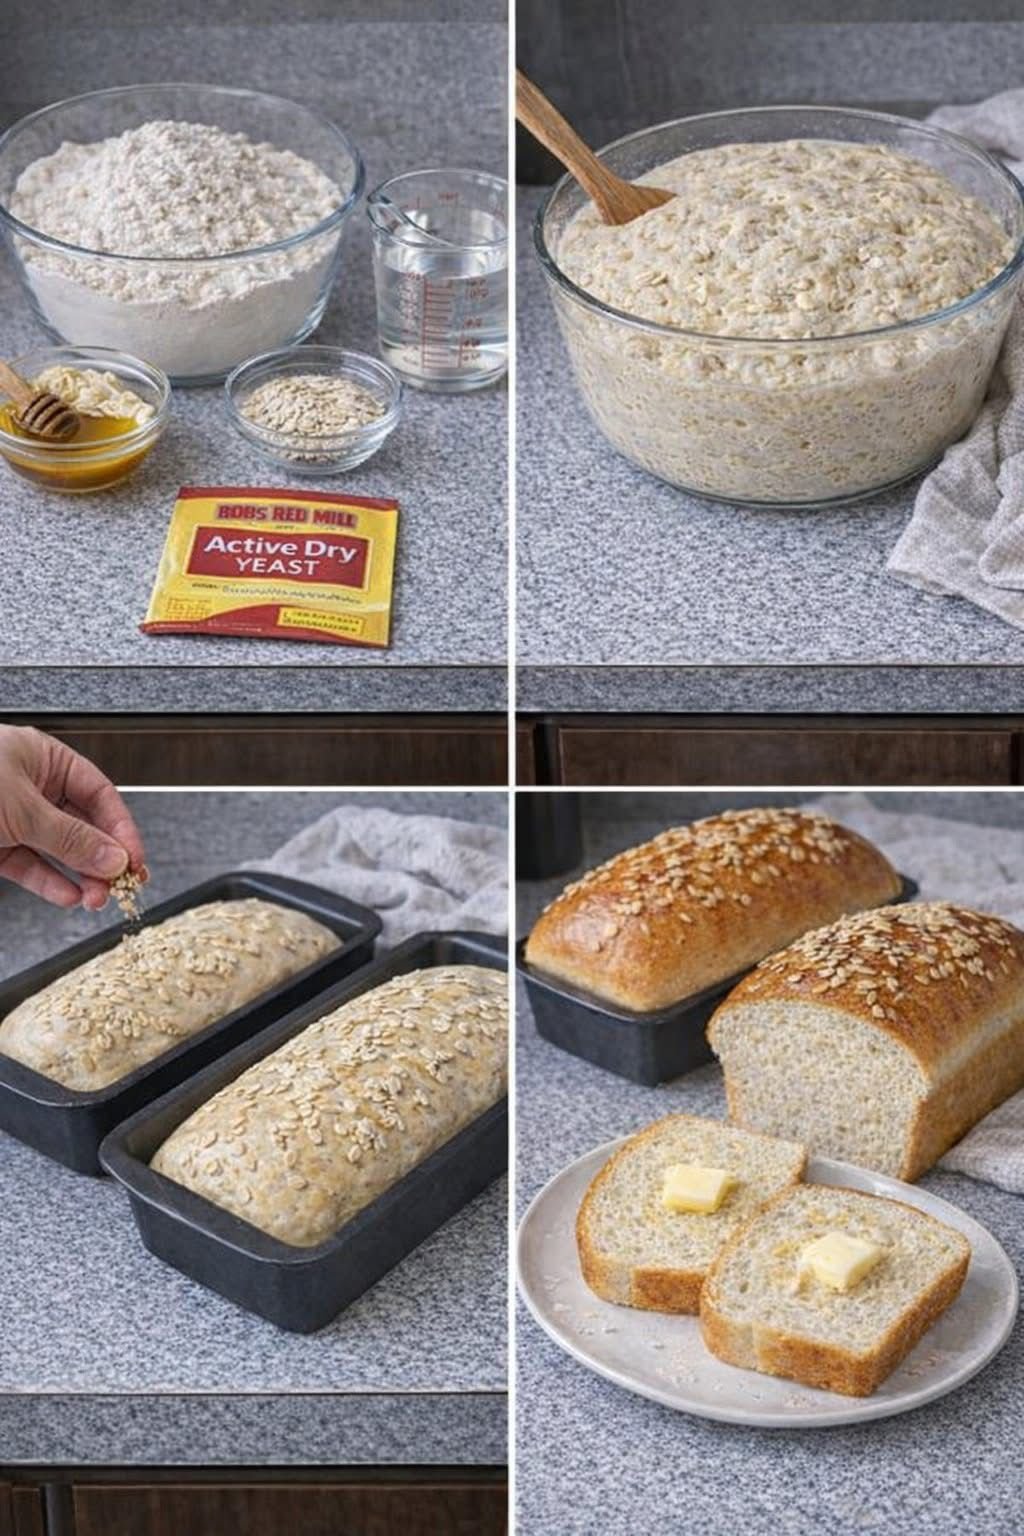
- Activate the Yeast: In a large mixing bowl, combine the warm water and a pinch of the granulated sugar. Sprinkle the active dry yeast over the water. Let it sit for 5-10 minutes until the yeast is foamy and bubbly, indicating it’s active. If it doesn’t foam, your yeast may be old or the water temperature was incorrect; start again with fresh yeast.
- Combine Wet Ingredients: To the activated yeast mixture, add the warm milk, remaining granulated sugar, melted butter, and salt. Stir gently to combine all the wet ingredients thoroughly.
- Begin Adding Flour: Gradually add 3 cups of the all-purpose flour to the wet ingredients, one cup at a time, mixing with a wooden spoon or sturdy spatula until just combined and smooth. The mixture will be quite loose at this stage.
- Form the Dough: Continue adding the remaining flour, ½ cup at a time, mixing until the dough starts to come together and pull away from the sides of the bowl. You may not need all 7 cups of flour, or you might need a tiny bit more; the goal is a soft, slightly sticky dough that is manageable.
- Knead the Dough: Turn the dough out onto a lightly floured surface. Begin kneading by hand (as shown in the image). Push the dough away with the heels of your hands, fold it back over, rotate, and repeat. Continue kneading for 8-10 minutes. The dough should become smooth, elastic, and no longer excessively sticky. To test if it’s sufficiently kneaded, perform the “windowpane test”: gently stretch a small piece of dough; if it stretches thin enough to be translucent without tearing, it’s ready.
- First Rise (Bulk Fermentation): Lightly grease a clean large bowl with butter or oil. Place the kneaded dough into the bowl, turning it once to coat the top. Cover the bowl tightly with plastic wrap or a clean kitchen towel. Place the bowl in a warm, draft-free place (around 75-80°F / 24-27°C) for 1 to 1 ½ hours, or until the dough has doubled in size.
- Punch Down and Shape: Once the dough has doubled, gently punch it down to release the air. Turn the dough out onto a lightly floured surface. Gently flatten the dough into a rectangle. Starting from one of the longer sides, tightly roll the dough into a log, pinching the seam closed firmly. Tuck the ends under slightly to create a neat loaf shape.
- Second Rise (Proofing in Pan): Lightly grease a 9×5-inch loaf pan generously with butter or oil. Carefully place the shaped dough seam-side down into the prepared loaf pan (as shown in the image). Cover the loaf pan loosely with plastic wrap or a clean kitchen towel. Return it to a warm, draft-free place for another 30-45 minutes, or until the dough has nearly doubled in size again and risen above the rim of the pan.
- Preheat Oven and Score: While the dough is on its second rise, preheat your oven to 375°F (190°C). If desired, just before baking, use a sharp knife or bread lame to make a single, shallow slash lengthwise down the center of the risen loaf (as shown in the image). This helps the loaf expand evenly.
- Bake the Loaf: Place the loaf pan in the preheated oven. Bake for 30-35 minutes, or until the crust is a beautiful golden-brown and the internal temperature reaches 200-210°F (93-99°C) with an instant-read thermometer (as shown in the image). If the top is browning too quickly, you can loosely tent it with aluminum foil for the last 10-15 minutes of baking.
- Cool Completely: Once baked, immediately remove the loaf from the oven and carefully turn it out onto a wire cooling rack. Allow the bread to cool completely for at least 1-2 hours before slicing (as shown in the image). This crucial step allows the internal structure to set, preventing a gummy texture.
- Serve and Enjoy: Once cooled, slice your beautiful Farmhouse Loaf and enjoy with butter, jam, or your favorite sandwich fillings!